Figma Plugins are an incredible way to save time in some otherwise quite repetitive or arduous processes. Here’s my own list, gathered from what I’ve come across online and been recommended by colleagues. Here are some plugins I use on use daily to enhance my productivity.
1. HTML to Design (html.to.design)
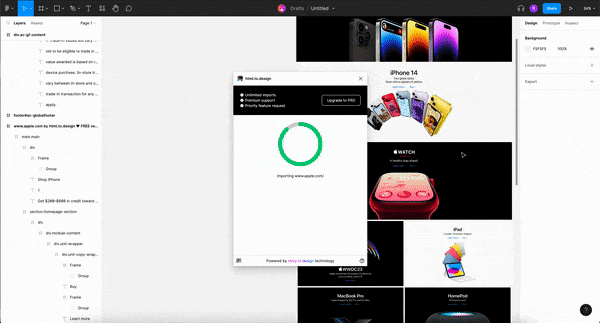
Created by divRIOTS, I’ve listed this one first as it really is one of the very few that genuinely blew my mind a bit when it was introduced to me while on a team meeting with some colleagues. As the name states, this plugin allows you to turn any webpage into a dynamic, editable Figma frame with ready-to-use layers and components.
Sounds a bit too good doesn’t it? Have a look below:
The opportunities are endless. For example, some of
You could also use this for some self-assigned design challenges that you choose to take on. Say you challenge
The plugin is free to use (win), but it does also come with a PRO license that offers unlimited conversions among other benefits should you be so inclined.
2. Table Creator
My next time-saving Figma plugin of choice was one created by freelance designer Gavin McFarland, this plugin allows you to create tables within a matter of seconds! As part of my job I often work on designs that either need or contain some type of table/grid and I can’t tell you the cumulative hours I must have wasted creating each grid from scratch. From one input field, to the divider, to the text input field, to the next…riveting, as I’m sure you can imagine.
I then figured someone out there must have had to do this too, as such there should surely be a quicker way to get this done, cue Table Creator.
As shown in the GIF above, you’re able to set parameters, choose
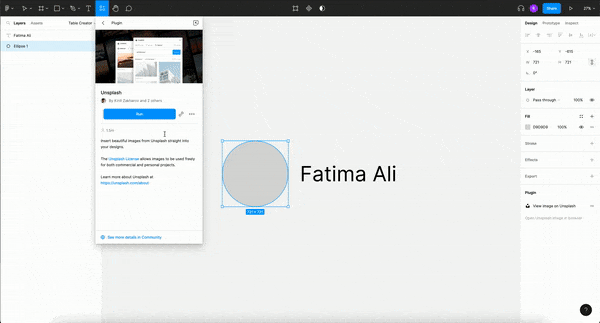
3. Unsplash
I’d be remiss not mention Unsplash, a plugin I’m sure we’ve either all used or come across at one point or another (even right here in Medium). Unsplash is probably the most popular Figma plugin and it’s no surprise why. It’s a massive hub of free stock images that has helped designers and developers the world over, from developing concepts, persona’s, gallery grids and all sorts — they’re a game changer. In their own words they provide:
“Beautiful, free images gifted by the world’s most generous community of photographers. Better than any royalty free or stock photos.”
Access to millions of beautiful images aside, what I especially like about Unsplash is that it provides a wider range of images of diverse people than I’ve seen on any other site. Most stock images are limited when free, and even the paid options don’t often provide the best options or bang for
The world is a vast and diverse place, it’s about time our prototypes and persona’s stop reflecting just one race, gender or naming convention.
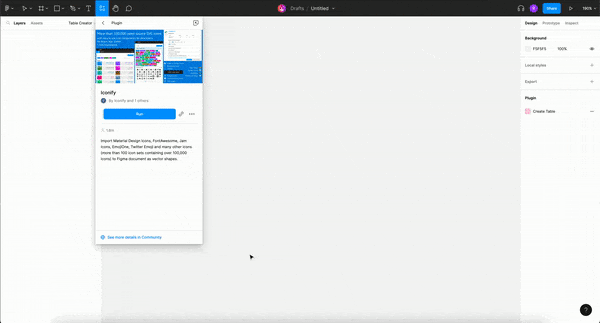
4. Iconify
Icon design and management can be quite time consuming, especially if you set
5. Colour Blind
Not only a time saver, but also great for Accessibility, the Colour Blind Figma plugin allows you to “view
Colour blindness affects 1 in 12 men and 1 in 200 women in the world, meaning any product you design will almost definitely cross the path of someone that is colourblind. This plugin allows you to take
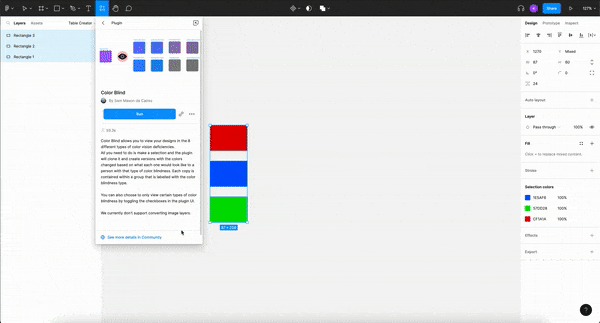
While the example used above is quite basic and for illustration purposes only, this can be used to review colour palette choices, particularly concerning shading or error/success states.
6. A11y — Colour Contrast Checker
In keeping with the theme of Accessibility, the A11y plugin created by Kelly Gorr checks the colour contrast of all visible text within a frame. This is especially helpful when creating button’s or search bars which traditionally have been designed with quite low contrast. I’d typically manually check contrast by using the Accessible Colours website, which is great, but again requires you to copy/remember the two colour code and paste them into their accessibility checker. A11y lets you run this check directly within Figma, ensuring
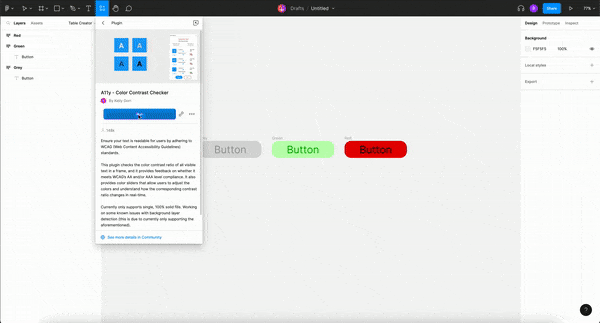
The process is quick and simple and once you’re set on an accessible contrast ratio, you can save this as a colour style for future iterations.
7. Content Reel
Last and certainly not least, we have Content Reel, another largely popular plugin that allows users to generate custom content en masse. There are a few plugins that offer similar functionality( most notably Faker), but what I enjoy about using Content Reel is that I am able to search for various text strings and save my own list of favourites. I am not confined to a predetermined list of content. It’s especially useful when generating diverse content as there are several varying demographics to choose from, whether based on the language of names, location specific telephone numbers or personal identification.
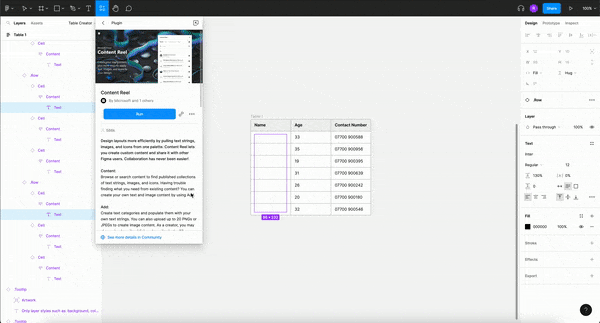
In the example shown above, I only showed how Content Reel can be used to generate text, but it also allows you to generate images and icons. It is a community-fed plugin giving expansive options, it’s a great option to speed up